Arcemu on Linux on Raspberry Pi 4b
Like I promised in my previous post, I’ve tried to build and run Arcemu with Linux on my Raspberry device.
I had to switch to Armbian Jammy (Ubuntu based) from the Diet PI (Debian based) however since Diet Pi unfortunately doesn’t have libmysqlclient21 and I didn’t want to install it from other sources, to make things simple.
Either way, I’m happy to report that, just like I expected, I could build it and it works fine as it is clearly visible on the picture below

This verifies that Arcemu can build and run on a real Arm based device, not just on a qemu emulated one.
Arcemu on Windows for Arm on Raspberry Pi
Several posts ago I reported that Arcemu now supports the Arm platform on both Windows and Linux.
Then I didn’t have an actual Arm device so I could only work with qemu emulation.
Having bought a Raspberry Pi and installed Windows for Arm on it I could finally try and verify it.
I am happy to report that it works without a problem on both Windows 10 and Windows 11 for Arm.


Altough I expect the same results soon I’m going to verify on Linux as well. 🙂
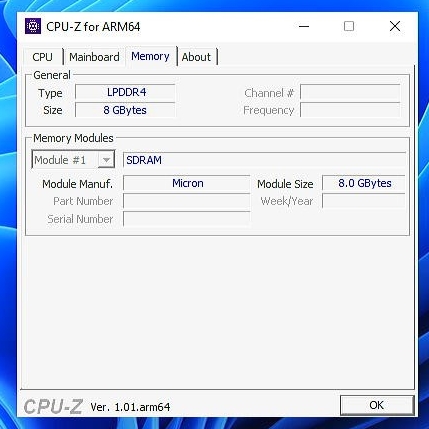
Cpu-Z for Windows on ARM64 on Raspberry Pi 4b
Some days ago the release of cpu-z for the ARM64 platform made headlines in tech news.
Out of curiosity I tried it on the Pi.
On Windows 10 it just didn’t work. It kept crashing on startup because of a perflib permissions issue.
However on Windows 11 it worked just fine, see the images:


Windows for ARM on my Raspberry PI 4b
In the previous post, I wrote that I wanted to get a Raspberry Pi 4b because I wanted to try Windows on it. It was only 2 days ago I finally made some time, and finally started tinkering with it.
Why would I want to do this?
Raspberry Pi is a fairly inexpensive Single Board Computer which makes it possible for me to test software especially software I develop on the Arm platform. Windows has support for Arm too and Raspberry is the cheapest solution to try it.
The installation process
My initial plan was to burn the Windows 10 for Arm ISO onto an SD Card, boot from it, and then install the system onto an USB flash drive.
That plan unfortunately failed, because Raspberry just wouldn’t boot from the SD Card.
Instead it was complaining that the card didn’t have a FAT filesystem.

Fortunately I found the Windows on Raspberry project! It provides a tool with a wizard, that can deploy Windows from an ISO or ESD image to an SD Card or USB drive.
This means that once you are done flashing the image you will not have to go through the entire Windows install process, only the last stage: personalizing the fresh Windows deployment.
Just like when you buy a computer with preinstalled Windows.
I could get both Windows 10 and Windows 11 to work using this tool.
You can find the Windows on Raspberry project’s official installation guide here.
The instructions there, and the wizard steps are fairly straightforward so I’m not going to cover the process in full detail.
Unfortunately the official guide doesn’t contain images about the wizard, but I can remedy that:


Observations and problems
Heating
Even with a heat sink and fans, like my setup on the picture below, Raspberry is going to be hot during installation and setup as Windows is going to make the CPU cores work a lot so don’t be surprised.

Stability
Windows on the Raspberry Pi can be quite unstable. So don’t be surprised about the ocassional system crash. I’m fairly sure it’s because of the drivers. There’s nothing you can do about it sadly.
Networking
Because of lack of drivers the Wi-Fi of the Pi will not work, so you will have to use the Ethernet port, or use an USB Wi-Fi adapter that Windows has drivers for.
However you should connect it only after finishing the installation (personalization) so that it doesn’t try to download updates during the process. It just slows it down. You can update later if you’d like.
Storage options
I used a 64 GB Samsung FIT plus flash drive, which is very small, thus doesn’t require much power AND fast. Perfect for such a use case. You should use something like this too.
Screen flickering
The screen can flicker on default settings when scrolling during the setup. I suspect this is because it doesn’t detect the screen properly.
You can remedy this by manually setting the HDMI mode in the boot options in the wizard.
For my 16:90 1920×1080@60hz display I entered these lines:
hdmi_group=2
hdmi_mode=2
For all the possible options see the official documentation of Raspberry Pi.
The results
After the installation if everything went right you can enjoy Windows on your Raspberry Pi.
Windows 10


Windows 11


Raspberry PI 4 model B
I really wanted to try an ARM based SBC so yesterday I ordered and today got a Raspberry PI 4 model B, with a dual-fan armor case, since I’m definitely going to push it to the limit.
I chose RPI 4 because it’s more mature, has more accessories, and I know that it can run Windows for ARM, which I’d like to try on it.
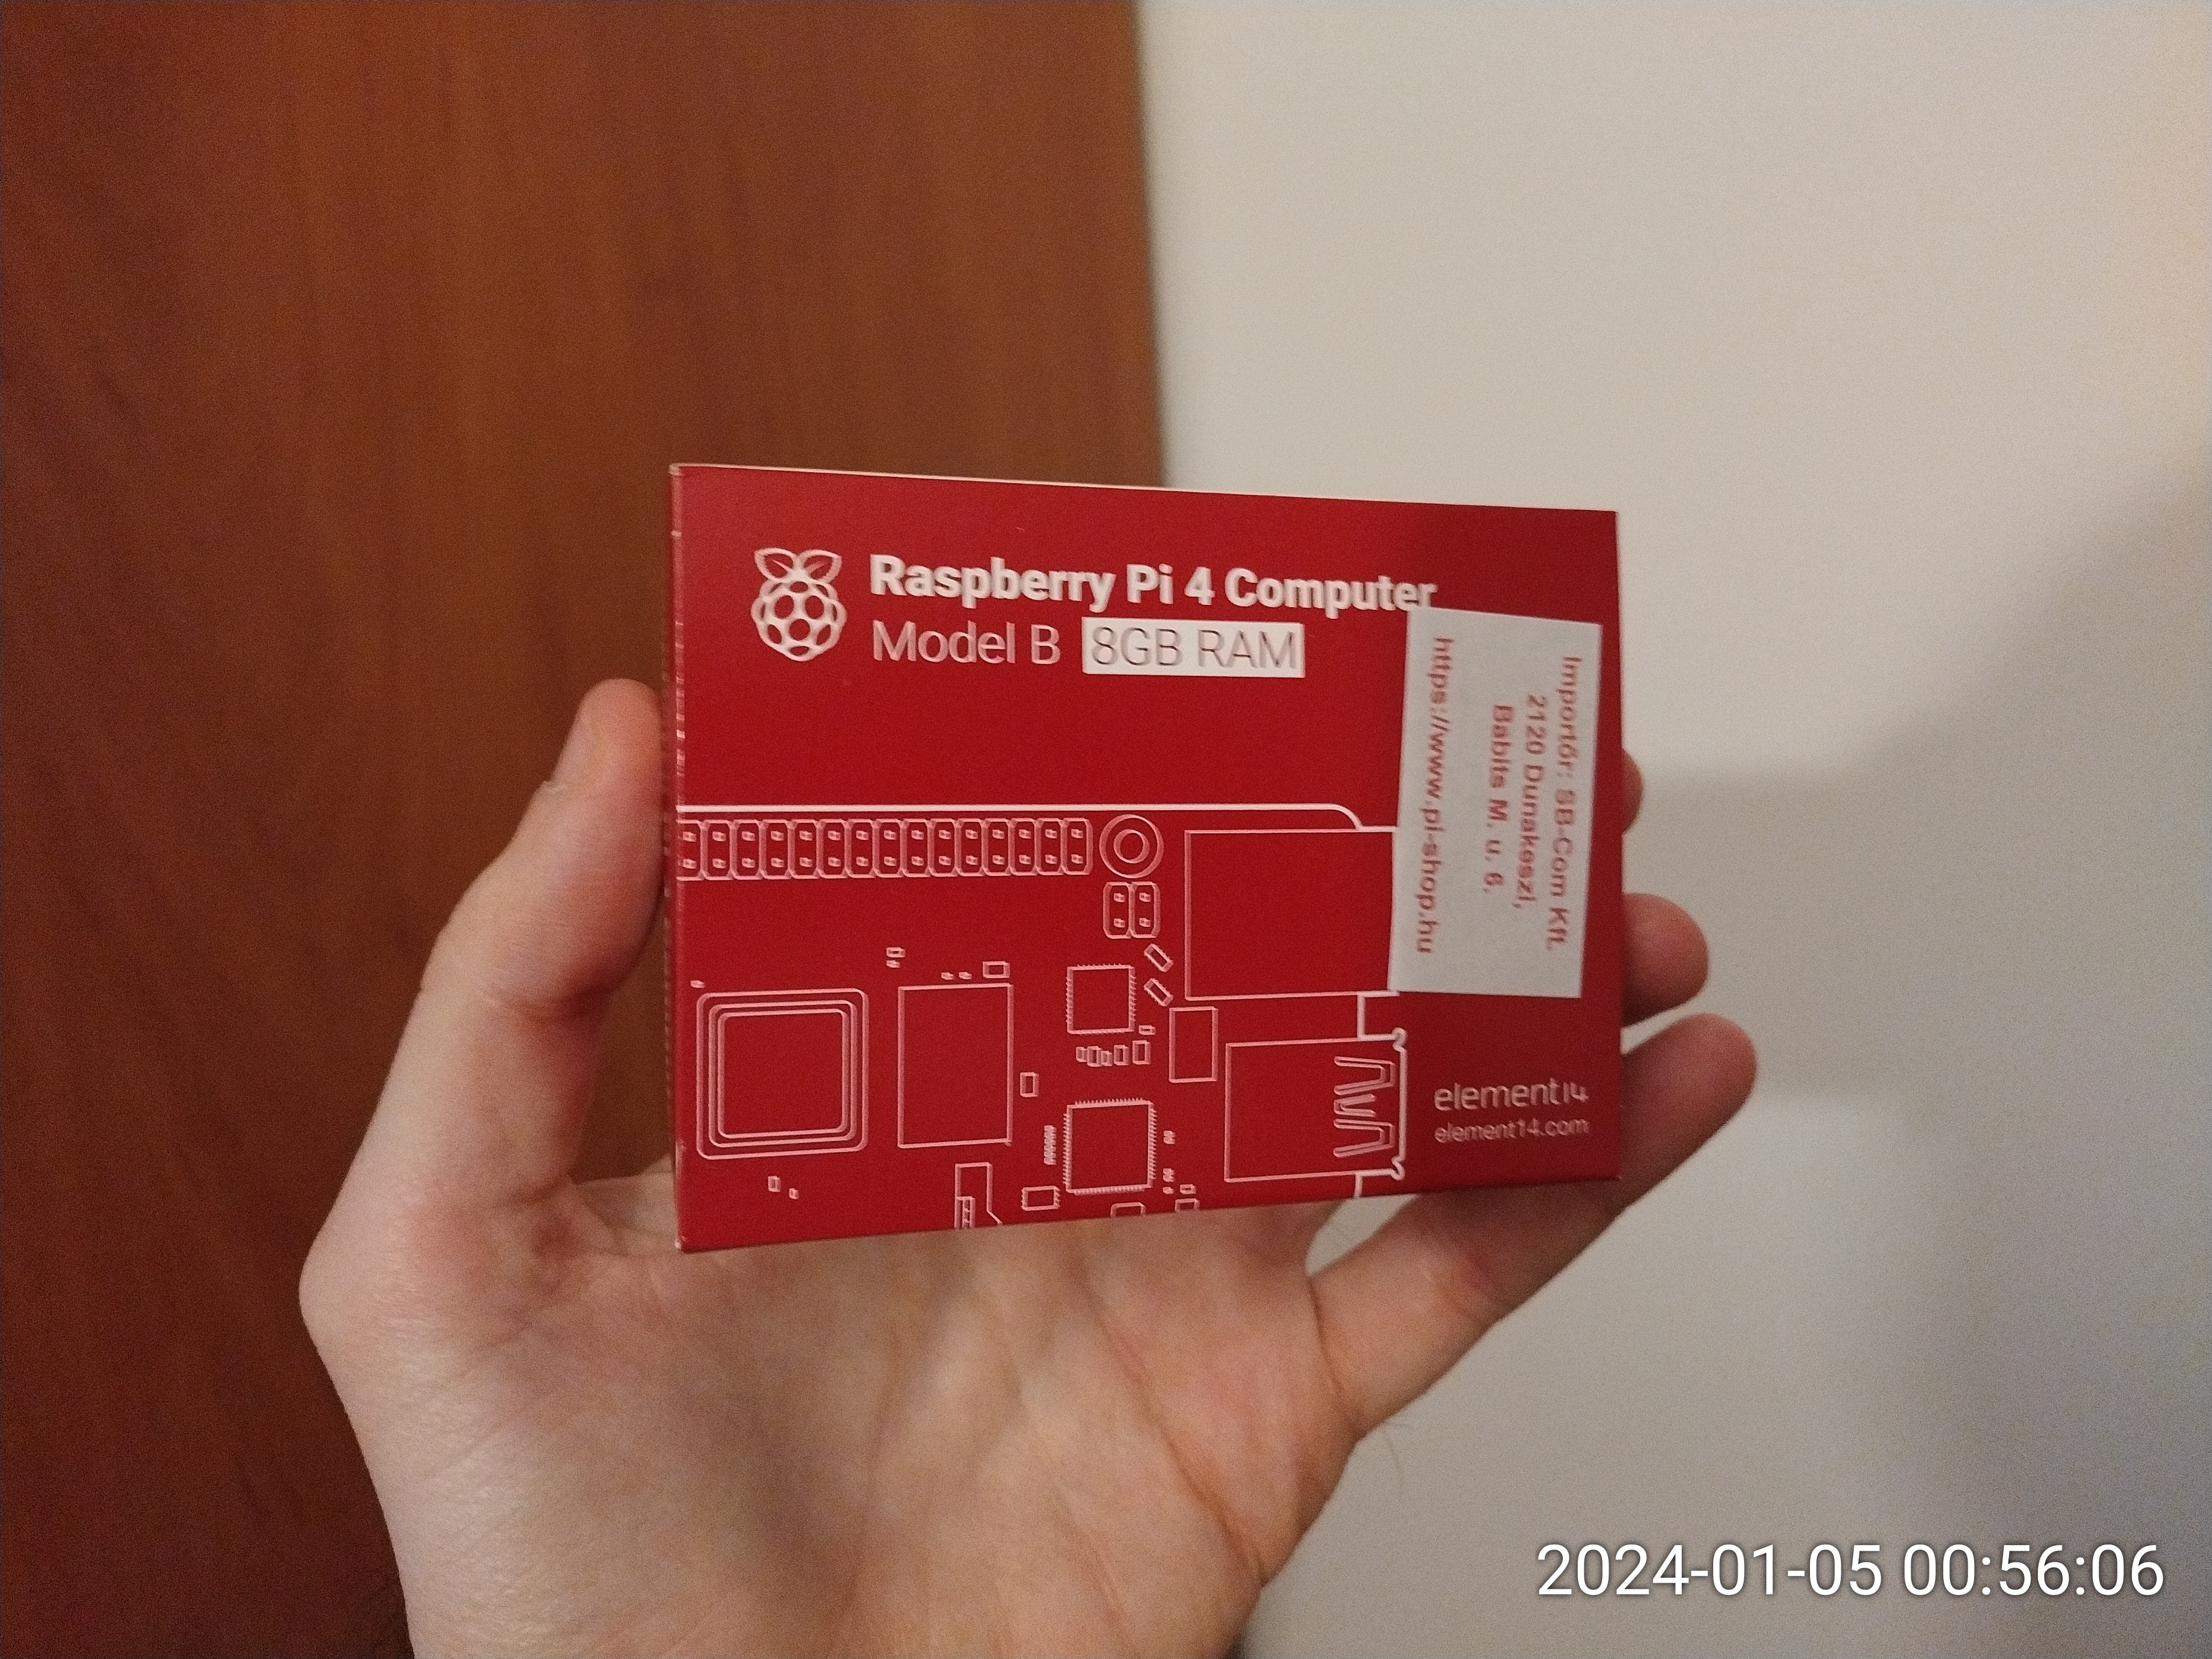


I think it looks cool in this case.
More importantly I’ve already installed DietPi on it.

From the installation I can already see that it’s faster than the RISC V devices I’ve tried, but I can’t wait to see how it performs during load (while building and then running Arcemu for example).
Milk-V Mars
In previous posts I’ve written about what the RISC V ISA is and why I think it to be important, and that I’ve ordered 2 Single Board Computers (SBC) so that I can play around with it.
This post is about the second, and much more powerful SBC I ordered, and got recently: Milk-V Mars


It’s most important features (for me) are the following:
- StarFive JH7110 SoC with a Quad core 64 bit RISC V 1,5 Ghz SiFive U74 CPU
- 8 GB LPDDR4 RAM
- 1x MicroSD slot
- 1x HDMI output
- 3x USB3 and 1x USB2 ports
- 1x RJ45 Gigabit Ethernet port
- 1x USB C port for power
Unfortunately it has no embedded Wifi or Bluetooth support 😦
However at least it’s form factor is the same as the Raspberry Pi 3b’s so it fits into it’s case even if not perfectly:


You can find the official documentation on Milk-V’s site.
The default OS image can be downloaded from Github. It is a Debian Bookworm with custom drivers, and Gnome 3 GUI, but it’s problematic at least:
- After startup my Mars overheated and froze
- The packages cannot be updated because it would ruin the factory customizations
So I cannot say that I’d recommend that image, but fortunately there’s another option that suits my needs better anyways. There’s a DietPi port for the StarFive SoC platform.
Under DietPi neofetch reports the system as a StarFive VisionFive V2, so don’t be surprised by that, however at least it also wishes everyone a Merry Christmas on login.


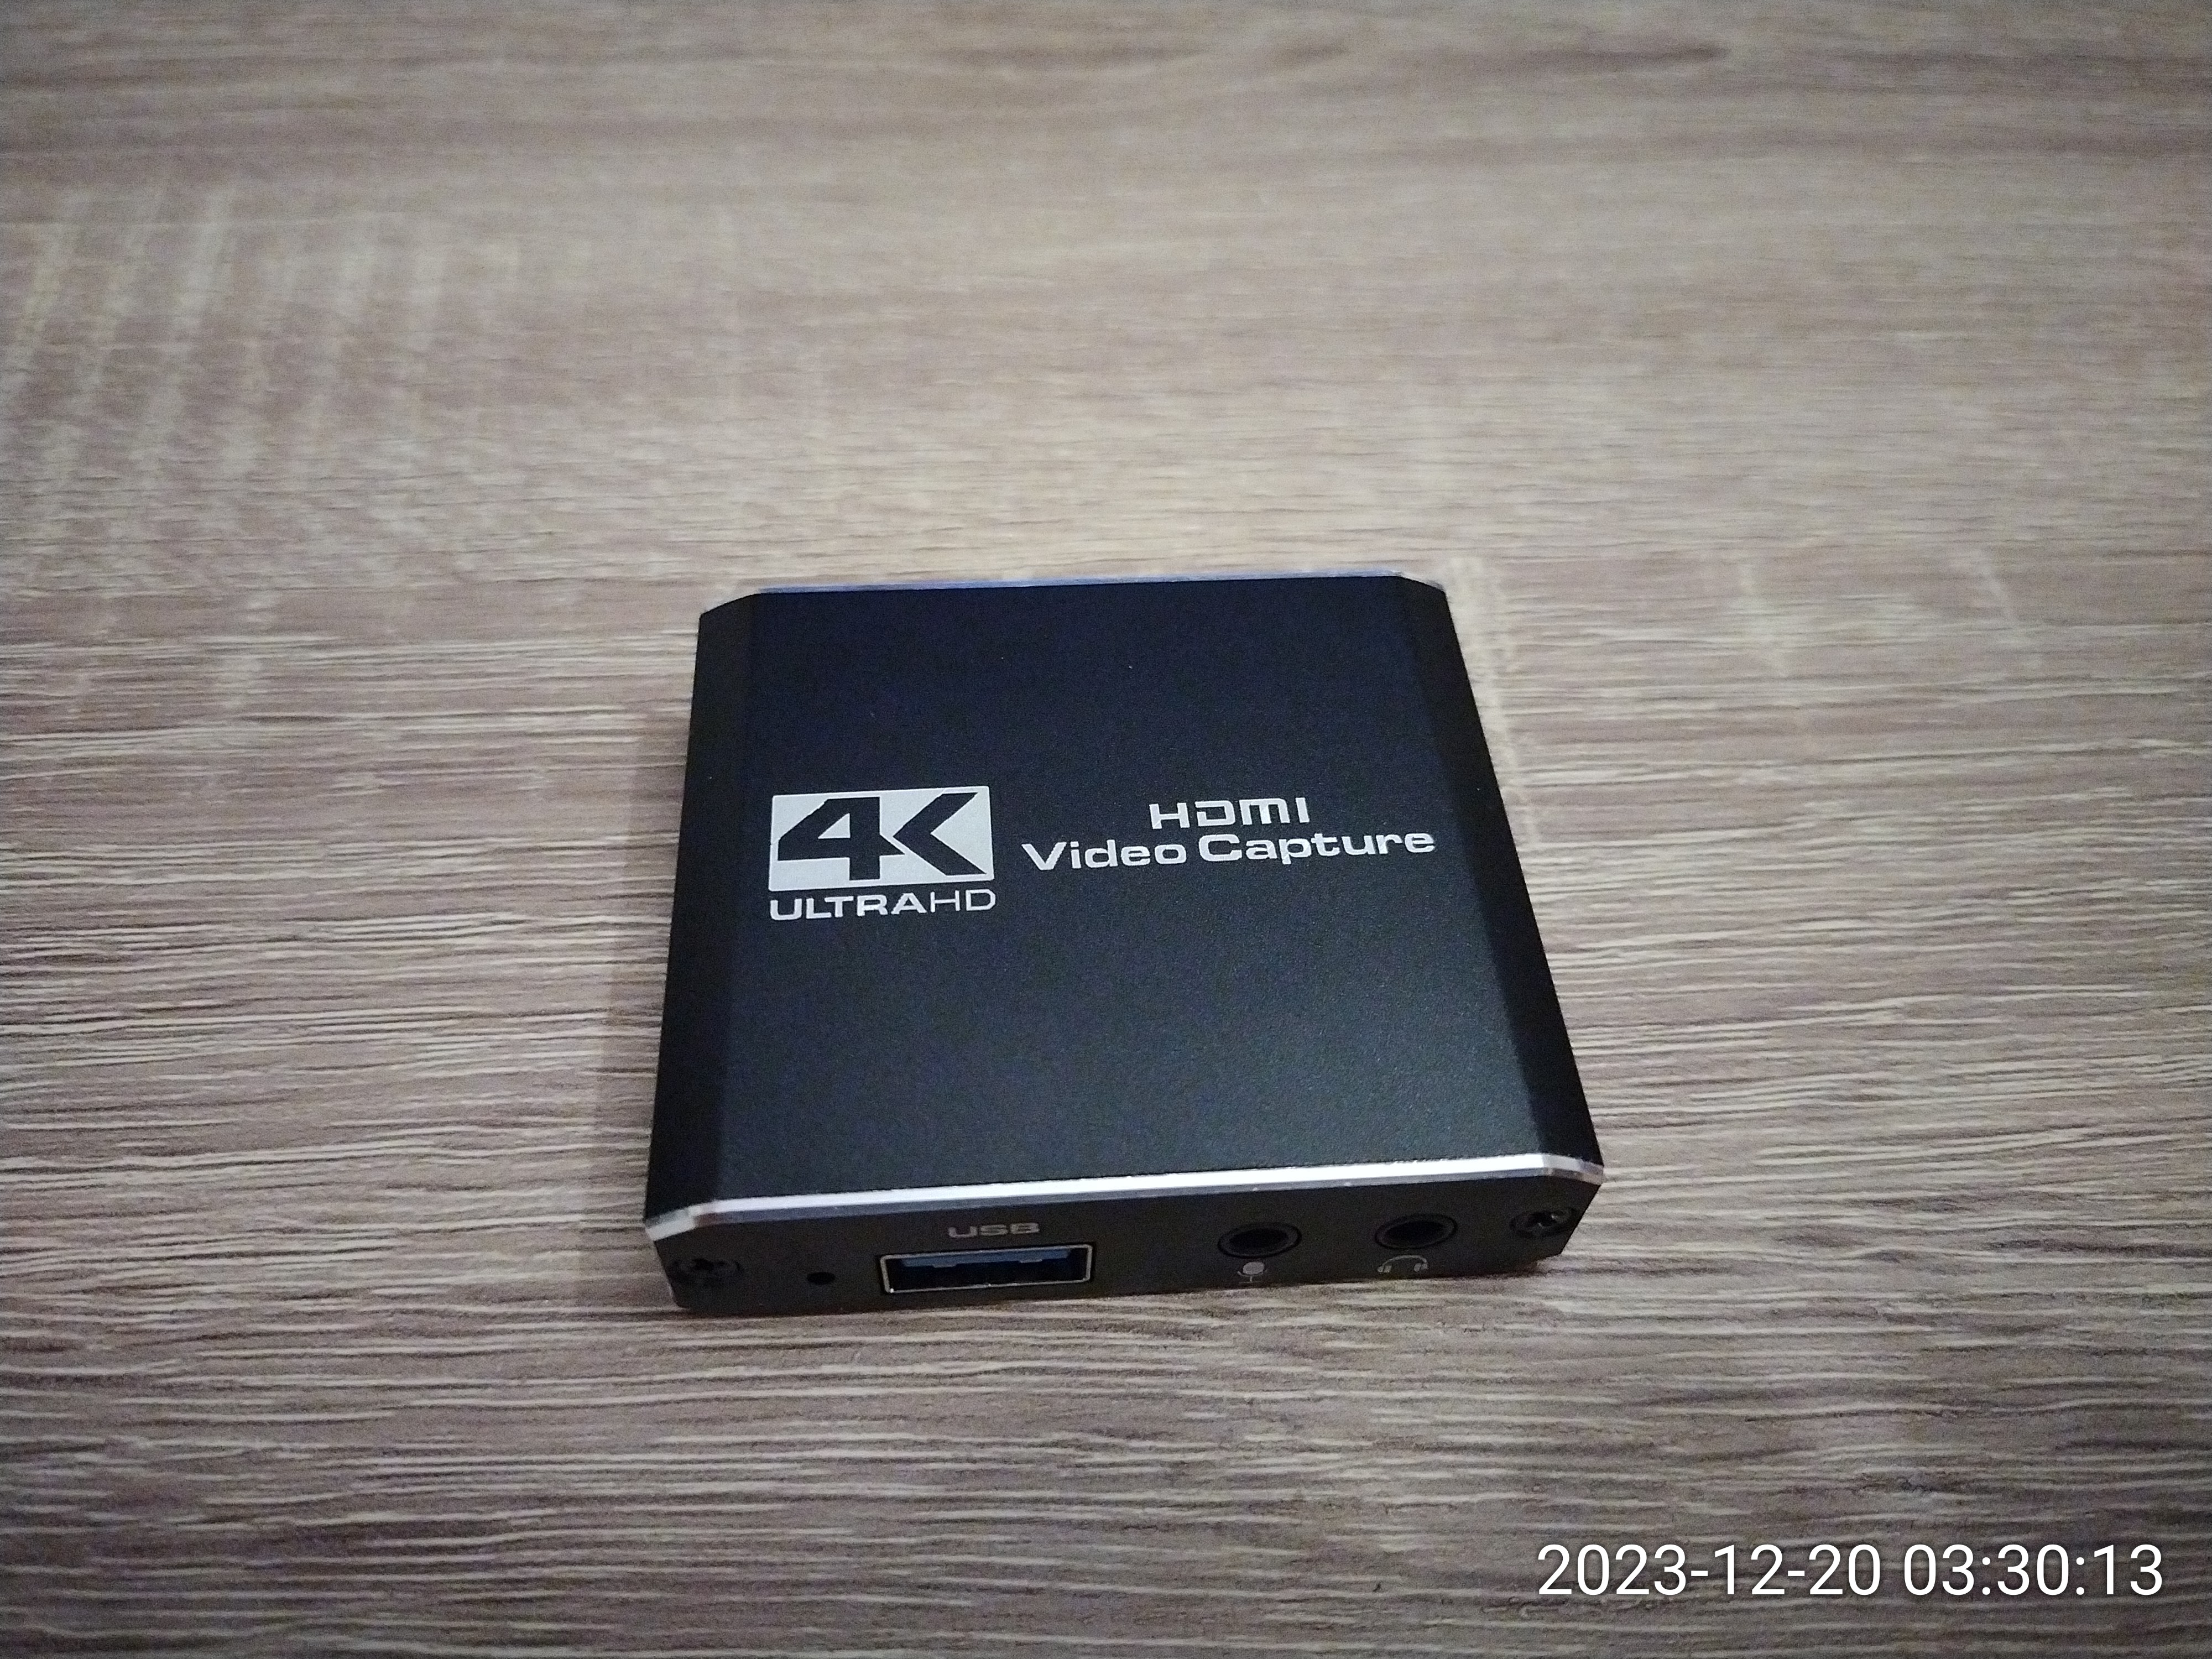
Capturing HDMI output
I was looking for an inexpensive device to capture HDMI output for the following reasons:
- I don’t have to buy a new display to use my Single Board Computers
- I can record the output of those devices
After some research I’ve found a possible solution to my needs: Gembird Cableexpert UHG-4K2-01
Basically it is a little box with an HDMI input, and HDMI, USB 3 and audio jack outputs.
You just have to hook it up to your device’s HDMI output to it’s input, and then connect it to your PC’s USB3 port with a USB cable.


While it should work with USB1 or USB2 the manufacturer recommends USB3 for the best resolution.
It supports both 4K (with just 30hz) and full HD (60hz). So it’s probably best to keep the resolution to just FullHD.
It shows up just like a webcam with the device name “USB Video”. Which means that your OS’ privacy settings apply to it. So if you can’t see what you are supposed to see then first check that webcam privacy settings don’t block it!
You can use the free OBS Studio software to display / capture.


If you so wish you can even connect the box’s HDMI output to a display for example if you play a game on your console and would like to use a TV as a screen, but that is not relevant to my needs so I never tested that feature.
MangoPi MQ Pro
In the previous post I explained why the RISC V architecture is important.
This post is about one of the devices I acquired to play around with the RISC V ISA: The MangoPi MQ Pro.
It is a cheap (20-40 USD), entry level, low power, low performance IoT edge computing device, a GPIO pin compatible competitor of the popular Raspberry Pi Zero W.
It even has the same form factor so it fits into the same case as you can see on the pictures below!
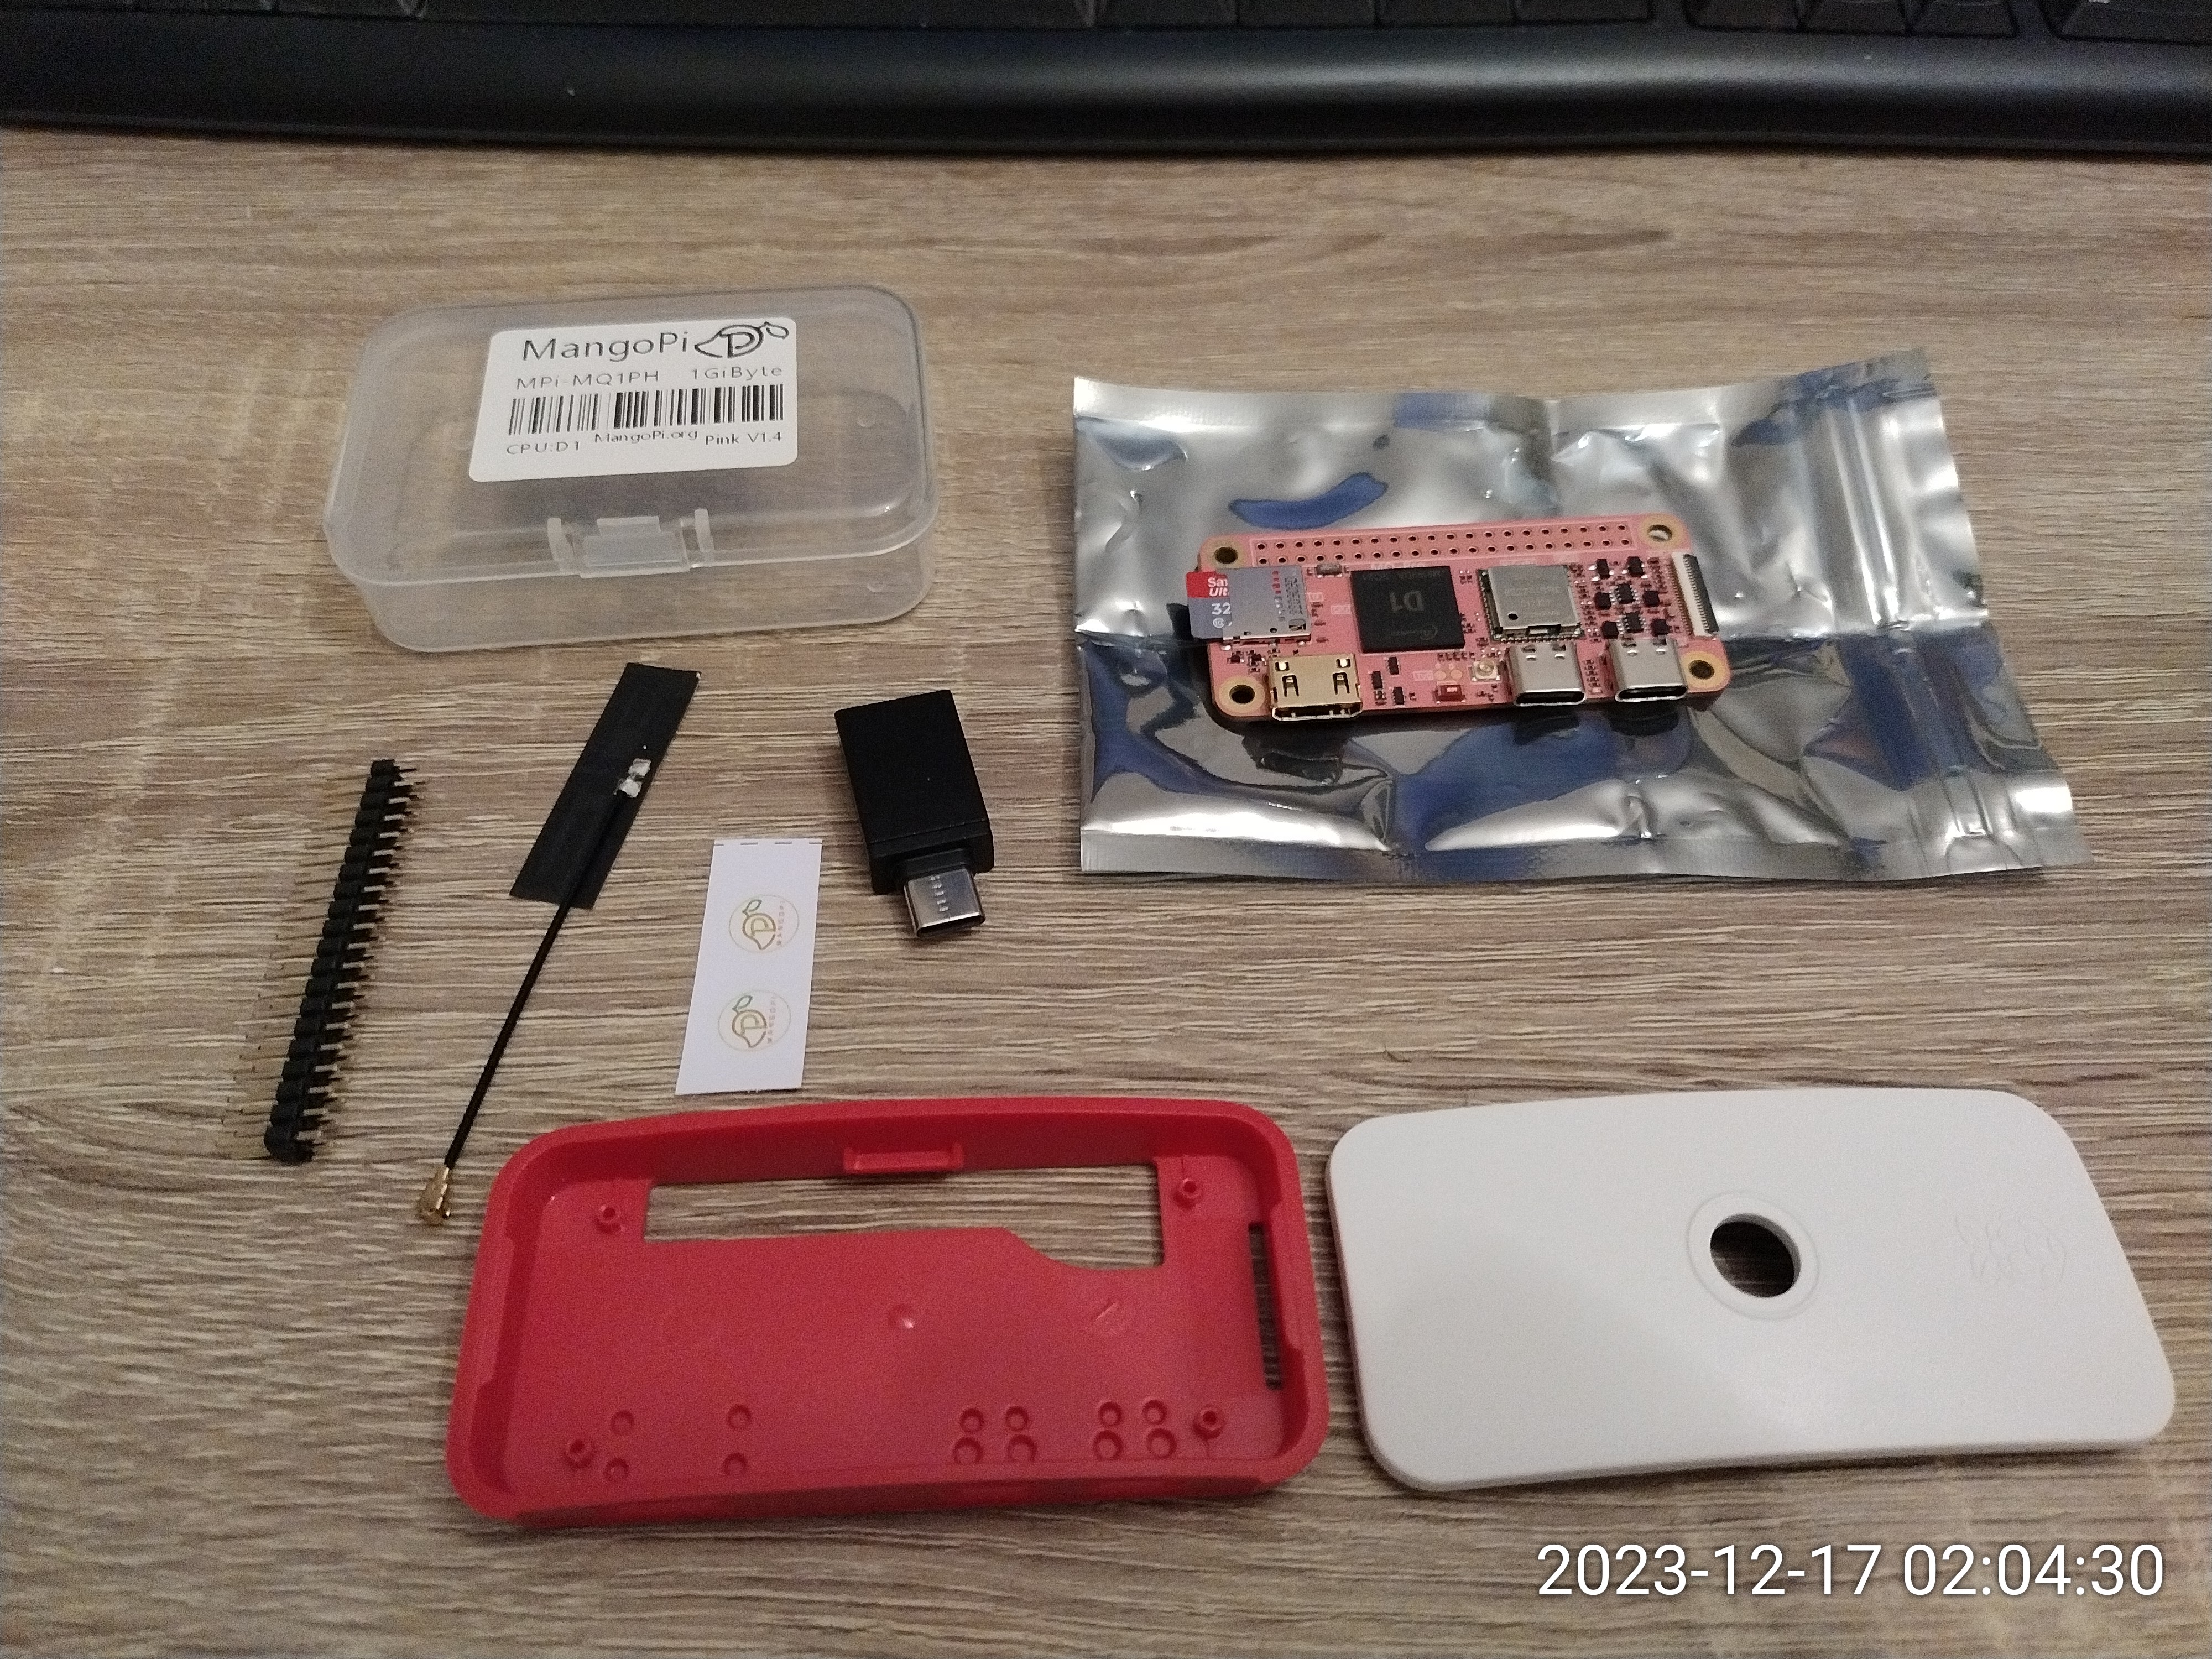

Hardware
- Allwinner D1 SoC with an 1 Ghz Alibaba T-Head XueaTie C906 single core 64bit RISC V CPU
- 512 MB or 1 GB DDR3 RAM (depends on which version you order)
- USB C OTG port
- USB C host port
- Mini HDMI video output
- micro SD card slot
- Wifi and bluetooth
Software
The device runs Linux and the manufacturer provides two options:
- Armbian 22.08 – which is a customized version of Ubuntu 22.04, further customized/tailored for this device
- Tina Linux – which is a customized version of OpenWrt
The manufacturer recommends Armbian, which you can download from the device’s website and write it on the micro SD card. It uses about 5 GB so at least a 8 GB card is needed.
It is important to note that it doesn’t work with stock generic Armbian, only with this customized version.
Also while it’s possible to start a desktop environment (XFCE) you really shouldn’t these devices are too slow and not meant for that kind of use cases.

Pro tip: The default root password for Armbian is 1234. You need this for the first log-in.
Since the device is quite slow it is not recommended to build the software intended to be run on the device itself. I used a qemu emulated Ubuntu 22.04 for building instead, and as expected even that was faster than this little device.
